

What Is Ramp?
Ramp is a spend management platform built to handle company spending in one place, including:
- Corporate cards
- Employee expenses
- Reimbursements
- Bill payments
- Vendor management
- Approval workflows
- Accounting integrations
- Spending policies and controls
- Reporting and spend visibility
The goal is a controlled spending environment. It cuts manual work for employees, managers, and your accounting team. Getting there starts with proper accounting software setup. The connection between Ramp and your books is only as clean as the setup underneath it.
Ramp Onboarding Checklist
Use this checklist when implementing Ramp:
Before You Go Live
- Create Ramp account
- Complete company verification
- Add administrators
- Add employees
- Assign appropriate user roles
- Connect accounting system
- Import accounting fields
- Configure visibility preferences
- Set up spending policies
- Configure card limits
- Issue physical/virtual cards
- Configure expense requirements
- Set up approval workflows
- Configure reimbursements
- Set up vendors and Bill Pay
- Configure budgets/funds
- Test accounting synchronization
- Test approval workflows
- Train employees
Go Live
- Monitor transactions and workflows
Ramp Setup and Onboarding, Step by Step
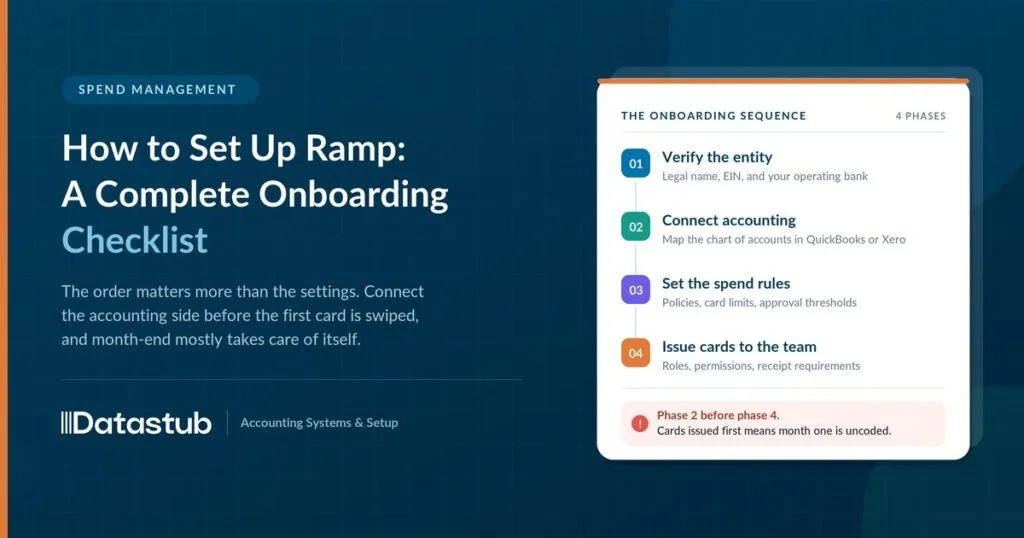
A successful Ramp implementation starts with proper planning. The setup process covers a few things: connecting your accounting system, adding employees, setting spending policies, and testing every workflow. Skip a step and you pay for it later. Most rework we see traces back to one thing: chart of accounts cleanup skipped before the first sync.
Step 1: Create and Set Up Your Ramp Account
The first step is creating your Ramp account. Then you complete initial setup. During onboarding, plan to provide:
- Legal business name
- Business address
- Business structure
- Company ownership information
- Banking information
- Tax identification details
- Authorized administrator information
Ramp may require business verification before certain features unlock. Keep your legal, banking, and ownership information ready before you start. It speeds up verification more than anything else.
Step 2: Add Administrators and Employees
Once the company account exists, administrators (admins) can start adding users. Add employees based on their role and spending needs. Common roles include:
- Administrators
- Managers
- Employees/cardholders
- Accounting or finance users
- Bill Pay/AP users
Give each user only the access their role needs. An employee who only submits expenses doesn’t need administrative settings or payment controls. Narrow access here, and your internal controls hold up as the team grows.
Step 3: Connect Your Accounting System
One of the most important onboarding steps is connecting Ramp to your accounting system. This lets data move between the two automatically. To connect: go to Accounting, select Connect, choose your ERP (enterprise resource planning) or accounting provider, and authorize the connection. Depending on your system, you may also need to configure:
- Chart of accounts
- Dimensions
- Vendors
- Customers
- Tax codes
Review your accounting structure before turning on sync. An organized chart of accounts cuts cleanup work later by a wide margin.
Step 4: Configure Accounting Fields
Accounting fields determine how transactions get coded. They’re what makes a transaction searchable and reportable months later.
| Accounting field | Example |
|---|---|
| Account | Office Supplies |
| Dimensions | Department – Marketing, Location – NY, Class – Ops |
| Entity | ABC Holdings |
| Project | Project A |
Start with the fields your reporting and bookkeeping actually require. Extra fields employees don’t understand tend to sit blank or get miscoded, which defeats the purpose.
Step 5: Set Up Spending Policies
Ramp’s biggest advantage is setting spending controls before employees spend, not after. Admins can build policies around:
- Employee
- Department
- Location
- Merchant category
- Spending amount
- Type of expense
- Frequency
- Approval requirements
For example, marketing employees might spend up to $1,000 per transaction without extra approval. Larger transactions route automatically to a manager. Spending policies cut unauthorized spending and set clear employee expectations. They also tighten budget control and automate approvals that used to happen by email.
Step 6: Configure Corporate Cards
With spending policies in place, admins can issue cards. Each card can be physical or virtual, built around the employee’s role, spending limit, and approval rules. Virtual cards work well for software subscriptions, online purchases, advertising, and vendor payments. Use them anywhere you want tighter control without handing out a physical card.
Step 7: Configure Expense Requirements
Expense requirements set what employees must provide with a transaction. This can include receipts, an accounting category, a business purpose, a memo, or specific dimensions. If your company requires an accounting category on every expense, make that field mandatory. This one setting stops most incomplete transactions before they reach your accounting team.
Step 8: Set Up Approval Workflows
Approval workflows make sure the right person reviews a transaction before it’s paid or finalized. A basic version: an employee submits an expense, a manager reviews it, finance reviews it, and the transaction is approved.
Build approval rules around dollar amount, department, employee, manager, expense type, vendor, or policy exceptions. A simple version routes small expenses to a manager and larger ones up the chain, as shown below.
| Expense amount | Required approval |
|---|---|
| Under $250 | Manager approval |
| $250 – $1,000 | Department head approval |
| Above $1,000 | Finance approval |
Step 9: Configure Reimbursements
Ramp also handles employee reimbursements. An employee submits an expense they paid for personally, along with proof. It gets reviewed, approved, paid, and synced to accounting. The employee can track the status the whole way through, instead of chasing an answer over email.
Step 10: Set Up Bill Pay and Vendors
Businesses can centralize accounts payable and vendor payments in Ramp. An invoice comes in, gets coded, gets approved, gets paid, and syncs to accounting. It sits in a searchable history after that. During setup, establish vendor onboarding steps, required vendor information, invoice approval rules, payment permissions, payment methods, and accounting coding requirements. A structured AP process is what keeps an unauthorized payment from slipping through.
Step 11: Configure Budget and Fund Controls
Set up budgets or funds for specific departments, teams, projects, or spending purposes:
| Department | Monthly budget |
|---|---|
| Marketing | $10,000 |
| Operations | $15,000 |
| Sales | $8,000 |
| IT | $5,000 |
These controls let management track spending against budget in real time. Once a budget is used up, the linked spending controls restrict further spending automatically.
Step 12: Set Up Notifications and Controls
Notifications keep employees and administrators in the loop. They cover card transactions, expense submissions, approval requests, policy violations, reimbursements, bill approvals, payment status, and missing receipts. Good notifications stop a transaction from sitting incomplete for weeks.
Step 13: Test the Workflow Before Going Live
Test the complete workflow before rolling Ramp out to the whole organization. Run a test transaction through the full cycle: a card charge, a receipt, coding, approval, and the accounting sync. Also test an employee reimbursement, an approval workflow, a policy violation, a vendor bill, the payment process, and reporting. Catching a configuration issue here costs minutes. Catching it after go-live costs hours of cleanup.
Step 14: Train Employees
Employee training closes out onboarding. Employees should walk away knowing how to:
- Use their Ramp card
- Submit receipts
- Code transactions
- Submit reimbursements
- Respond to approval requests
- Follow the company’s spending policies
- Check the status of a transaction or reimbursement
A short training session with written instructions is usually enough for good adoption.
Step 15: Go Live and Monitor
Once testing is done, move to production. In the first few weeks, watch closely. Common issues to catch early:
- Uncoded transactions
- Missing receipts
- Policy violations
- Failed accounting syncs
- Pending approvals
- Unsubmitted expenses
- Incorrect coding
- Employee questions
Regular monitoring during this window surfaces the policies or workflows that need a second pass.
Key Benefits of Ramp
Once it’s running, a well-configured Ramp setup pays off in a few concrete ways. It closes the books faster. With accounting integrations and automated coding, your finance team spends less time on manual entry each month.
- Better spend control — limits and policies are set before employees spend, giving management real control.
- Reduced manual work — automated workflows cut repetitive tasks, replacing manual follow-up with built-in approvals.
- Improved expense management — employees submit receipts and details directly in the platform, instead of spreadsheets and email.
- Faster accounting processes — integrations and automated coding cut manual data entry and processing time.
- Greater visibility — finance and management see spending by employee, department, vendor, or category.
- Stronger internal controls — role-based permissions, approval workflows, and spending limits tighten financial controls.
- Easier reimbursements — employees submit and track requests through the platform, instead of manual follow-up.
- Streamlined accounts payable — Bill Pay organizes invoice intake, coding, approval, payment, and accounting in one place.
- Better employee experience — one platform handles cards, expenses, receipts, and reimbursements.
- Scalable financial operations — automated workflows let finance handle more volume without adding headcount at the same rate.
Best Practices for a Successful Ramp Implementation
A few habits separate a clean implementation from one that needs rework six months later. Start with your accounting process. Understand how transactions should appear in your books before you touch Ramp’s settings. If that process isn’t solid yet, outsourced bookkeeping can fix the foundation first. Then you build automation on top of it.
- Keep policies simple — employees follow policies that are clear and easy to understand.
- Use automation wherever it fits — approvals, coding requirements, recurring transactions, and other repetitive work.
- Give users the right permissions — least privilege, every time.
- Test before launch — never assume a workflow will run exactly as designed.
- Monitor after implementation — review transaction data and employee feedback regularly and adjust.
How Datastub Helps
Setting up Ramp looks simple on the surface. What determines whether it actually works is different. It comes down to how closely the accounting fields, approval workflows, and spending policies match how your business already runs. Our accounting outsourcing team connects Ramp to your accounting system. We organize your chart of accounts so nothing needs cleanup later. We also build approval workflows and spending policies around real internal controls. If Ramp is already live and the sync or coding still feels messy, we’ll review the setup. We’ll tell you plainly what needs fixing.
FAQ
What information do I need to set up a Ramp account?
Your legal business name, address, business structure, ownership information, banking details, tax ID details, and authorized administrator information. Ramp may require business verification before certain features unlock. Having this ready in advance speeds up setup.
Which accounting systems does Ramp connect to?
Ramp integrates with a long list of accounting systems, including:
- QuickBooks Online and QuickBooks Desktop
- Xero
- NetSuite
- Sage Intacct, Sage 100, and Sage 300
- Zoho Books
- Odoo
- Yardi
- Microsoft Dynamics
Your chart of accounts, dimensions, vendors, customers, and tax codes sync automatically. Nothing needs to be entered twice.
Is Ramp only for corporate cards?
No. Beyond corporate cards, Ramp covers employee reimbursements, vendor bill payments through Bill Pay, spending policies, approval workflows, and budget controls. The biggest gains come from configuring it as a full spend management workflow. Treat it as more than a card program.
How do approval workflows work in Ramp?
Admins build approval rules around dollar amount, department, employee, manager, expense type, or vendor. For example, anything above a set threshold routes to a department head or finance for sign-off.
What should we test before rolling Ramp out to the whole company?
Test a full transaction cycle end to end. Run a card transaction with a receipt, coding, and approval syncing to accounting. Also test a reimbursement, a policy violation, a vendor bill, and reporting. Catching configuration issues in testing beats fixing them after employees are already using the system.
Conclusion
A successful Ramp implementation takes more than issuing corporate cards. Treat onboarding as a full spend management and accounting workflow project.
Configure users, accounting integrations, spending policies, cards, approval workflows, expense requirements, reimbursements, and Bill Pay correctly. You get a more controlled, more efficient financial operation.
The real payoff shows up when Ramp is built around your existing accounting and approval process. Don’t bolt it on as just a card program. Done right, it cuts manual work and improves spending visibility. It also strengthens controls and makes expense management easier for employees and finance alike.
Rolling out Ramp, or not sure your current setup is doing what it should? Reach out to Datastub for a free review, and we’ll tell you straight what’s working and what needs fixing.
This piece reflects Ramp’s publicly documented features and setup process as of August 2026, verified against Ramp’s official support documentation. Ramp periodically updates its features and workflows — confirm current details at ramp.com or support.ramp.com before implementation. This is general product information, not financial, tax, or legal advice.