

Your bookkeeper is still waiting for the gas station receipt from three weeks ago. The utility bill is saved as a photo in your phone. Your accountant is asking for a bank statement you thought you already emailed.
This isn’t a bookkeeping problem. It’s a paperwork problem. Hubdoc solves it by automatically collecting your bills, receipts, and statements, extracting the important details, and sending them directly to your accounting software. Set it up correctly, and you stop searching for receipts. They’re already there.
Here’s the full setup and onboarding process, step by step.
What Is Hubdoc?
Hubdoc is a document management tool owned by Xero. It works with both Xero and QuickBooks Online, and helps you manage your business documents automatically. It does three main things:
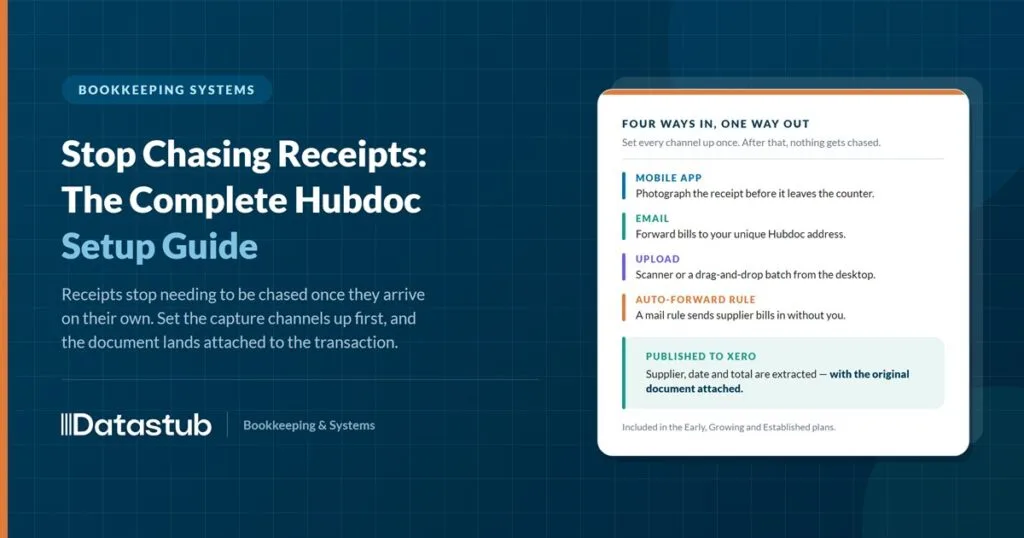
- Collects your bills, receipts, and bank or credit card statements — by email, mobile app, upload, or automatic fetch from the source
- Reads each document and pulls out details like the vendor name, date, amount, and invoice number, so nobody has to type it in by hand
- Publishes the document into your accounting software as a transaction, with the original file attached for backup
If you’re on an eligible Xero plan, Early, Growing, or Established, Hubdoc is included at no extra cost. It also connects with QuickBooks Online to publish bills, expenses, and supplier credits with the original document attached. Beyond that, Hubdoc integrates with Bill.com, Google Drive, Dropbox, and Box, making it easy to store and manage your documents. Getting that first connection right is exactly the kind of accounting software setup work that pays off for months afterward.
Hubdoc Onboarding Checklist
Before You Go Live
- Create or access your Hubdoc account
- Connect your accounting software
- Set organization and document preferences
- Add users and set permission levels
- Set up your unique Hubdoc email address
- Install the mobile app
- Connect automatic fetch sources (banks, utilities, vendors)
- Set default publish settings
- Organize documents by folder or type
- Test document capture and data extraction
- Test publishing to your accounting software
- Reconcile a batch of published transactions
- Train your team on submitting documents
Go Live
- Monitor fetch connections
Step-by-Step Setup Guide
Step 1: Create or Access Your Hubdoc Account
If you’re using Xero on a plan that includes Hubdoc, you don’t need to create a separate account. Open Hubdoc from your Xero account, and it’s already linked to your organization.
If you’re setting up Hubdoc with QuickBooks Online, or using it as a standalone account, create a Hubdoc account and verify your email address. Before you start, know which accounting software you’re connecting. That choice affects a few setup screens later.
Step 2: Connect Your Accounting Software
This is the most important step. Connect Hubdoc to Xero or QuickBooks Online. That’s what turns the documents you upload into real accounting transactions, instead of just stored files. To connect: go to Settings, select Connected Apps (or Organization Settings), choose Connect, select Xero or QuickBooks Online, and authorize the connection. Once connected, Hubdoc can see your chart of accounts. That’s what lets it suggest where each transaction should be coded.
Step 3: Set Organization and Document Preferences
Once connected, set a few defaults so documents come in consistently:
- Default currency
- Date format
- How documents should be named once processed
- Whether documents auto-publish or wait for review before hitting your accounting software
Leave new documents set to review before publishing for the first few weeks. Once you trust the coding accuracy, loosen that to auto-publish for straightforward vendors.
Step 4: Add Users and Set Permission Levels
Invite the people who will upload or review documents: office staff, your bookkeeper, or field employees who take photos of receipts. Typical roles include:
- Owner/Admin — full access to settings, connections, and all documents
- Standard user — can upload and view documents, limited settings access
A field technician only needs to snap a photo of a receipt and hit send. They don’t need access to your accounting connection or organization settings. Keeping access narrow protects the setup from accidental changes.
Step 5: Set Up Your Unique Hubdoc Email Address
Every Hubdoc account comes with a unique email address. Forward emailed invoices, vendor statements, or receipt confirmations directly to this address, and Hubdoc pulls them in for processing.
A property management company asks vendors to send invoices by email. Instead of forwarding each one manually, the office manager sets up an email rule that forwards vendor emails to Hubdoc on its own. The invoices appear in Hubdoc without any extra work.
Step 6: Install the Mobile App
The Hubdoc mobile app lets users take a photo of a paper receipt and upload it instantly. It’s especially useful for contractors, delivery drivers, and sales reps who collect receipts while working outside the office. Take a photo of the receipt as soon as you receive it. It’s much easier than trying to find a lost or damaged receipt weeks later.
Step 7: Connect Automatic Fetch Sources
This is one of Hubdoc’s biggest time-saving features. It downloads statements from banks, credit cards, utility companies, and vendor portals on its own. You don’t have to download and upload them yourself.
To set it up, enter the read-only login credentials for each account you want to connect. Hubdoc checks for new statements regularly and pulls them in on its own. A fetch connection can sometimes stop working. A bank might change its login process, add multi-factor authentication, or update its website. If that happens, just reconnect the account. It’s a normal maintenance step, not an error in Hubdoc.
Step 8: Set Default Publish Settings
Decide how documents should land in your accounting software once they’re processed. A bank statement might become a record for reconciliation. A vendor bill might become a bill awaiting payment. You can also set up Supplier Rules: default coding for repeat vendors. A monthly software subscription, for example, always lands in the right account without manual sorting.
Step 9: Organize Documents by Folder or Type
Create folders for different document types: bank statements, vendor bills, receipts, and tax documents. This keeps your records organized and makes documents easy to find later, especially during tax filing or an audit.
Step 10: Test Document Capture and Data Extraction
Before rolling Hubdoc out to your whole team, upload a few sample documents: a receipt, an invoice, a bank statement. Check that Hubdoc correctly captures the vendor name, date, amount, and invoice number. Correct a vendor once, and Hubdoc remembers it. The correction carries over to that supplier’s future documents.
An electrical contracting business tests with five recent supplier invoices. Four come through perfectly coded. The fifth, from a supplier with an unusual invoice format, needs the vendor name corrected once. Hubdoc remembers that correction. The same supplier’s future invoices come through right after that.
Step 11: Test Publishing to Your Accounting Software
Publish a small batch of test documents into Xero or QuickBooks Online. Confirm they land as the right kind of transaction, coded to the right account, with the source document attached.
Step 12: Reconcile a Batch of Published Transactions
Match a set of published transactions against your bank feed to confirm the whole chain works: capture, extract, publish, reconcile. Do this before depending on it for a full month’s books.
Step 13: Train Your Team on Submitting Documents
Everyone who touches receipts or bills should know:
- How to forward an invoice to the Hubdoc email
- How to snap a photo with the mobile app
- What counts as a good enough photo (readable, well-lit, not cropped)
- Who to ask if a document doesn’t process correctly
A five-minute walkthrough plus a one-page reminder sheet covers most teams.
Step 14: Go Live and Monitor
Once testing is solid, make Hubdoc part of the regular routine. In the first few weeks, keep an eye on fetch connections, documents stuck in review, and anything coded to the wrong account. After the first month, this usually settles into a five-minute weekly check instead of active monitoring.
Key Benefits of Hubdoc
Once it’s running, a well-set-up Hubdoc changes how paperwork moves through your business.
- Less manual data entry — Hubdoc reads and codes documents automatically, so nobody retypes vendor names, dates, or amounts by hand.
- Fewer missing receipts — documents get captured the moment they arrive, instead of sitting in an inbox or a shoebox until tax season.
- Faster reconciliation — published transactions auto-match to your bank feed, so your bookkeeper reconciles a batch at once instead of chasing down each one.
- Audit-ready records — every transaction keeps the original source document attached, so you’re never searching for proof after the fact.
- Less time on admin — automatic fetch pulls statements from banks and vendors on its own schedule, without anyone logging in to download them.
- Easier team collaboration — field staff, office admins, and your bookkeeper all work from the same system instead of emailing files back and forth.
Best Practices for a Smooth Hubdoc Setup
A few habits keep a Hubdoc setup clean instead of turning into cleanup work later.
- Start with review-before-publish — build trust in the coding before turning on full automation.
- Correct a vendor once, thoroughly — Hubdoc applies that correction going forward, so a careful first fix saves repeated cleanup.
- Keep permissions narrow — give each user only the access their role needs.
- Reconnect fetch sources promptly — a broken bank connection that sits unnoticed for weeks creates a backlog.
- Review folder organization quarterly — as vendors and document types change, your folder structure should keep up.
How Datastub Helps
Hubdoc setup looks simple on the surface. What actually saves time takes more judgment: how documents get coded, which sources get connected to fetch automatically, how publish settings match your existing chart of accounts. At Datastub, we set up Hubdoc around how your business already operates. We connect it cleanly to Xero or QuickBooks Online. We make sure what lands in your books is accurate the first time, not something that needs cleanup later. This is the same hands-on work we cover in our bookkeeping services. If documents already feel like they’re piling up instead of flowing through, we’ll look at the setup and tell you plainly what needs fixing.
FAQ
Is Hubdoc free?
If you’re on certain Xero subscription plans, Hubdoc is included at no additional cost. Confirm which plan you’re on and whether Hubdoc is included, since Xero’s plan lineup and inclusions can change.
Does Hubdoc work with QuickBooks Online?
Yes. Hubdoc connects directly to QuickBooks Online, publishing documents as bills, expenses, or supplier credits with the source file attached. That’s similar to how it works with Xero. Screen names and a few setup details differ between the two. Confirm exactly how documents will land in your specific accounting software before you rely on it fully. Hubdoc does not integrate with QuickBooks Desktop, only QuickBooks Online.
What’s the difference between forwarding an email and using automatic fetch?
Forwarding requires someone to send the document to your Hubdoc email address. Automatic fetch is different. Hubdoc logs into a bank, credit card, or vendor portal on its own recurring schedule. It pulls new statements down without anyone doing anything. Fetch is the bigger time-saver, but it takes an initial setup step: providing login access to each source.
What happens if Hubdoc misreads a document?
You can correct the vendor, date, or amount before it publishes. Hubdoc generally remembers the correction for that vendor, so future documents from the same source come through accurately without repeating the fix.
Can field employees use Hubdoc without full account access?
Yes. Give them a standard user role. It’s focused on capturing and submitting documents through the mobile app or email. It doesn’t include access to organization settings or the accounting connection.
How long does a full Hubdoc setup take?
A single-entity business with one or two accounting connections can usually finish setup and testing in a few hours, spread over a week. Businesses with multiple entities, several bank accounts, or many vendors to fetch from need more time. Expect the full rollout, including team training, to take two to three weeks.
Final Thought
The point of Hubdoc isn’t the software. It’s getting the paperwork out of your way so the numbers can speak for themselves. A setup that captures documents automatically, codes them correctly, and hands clean records to your bookkeeper turns month-end close from a scramble into a formality.
Not sure your Hubdoc setup is pulling its weight, or starting from scratch? Reach out to Datastub for a free review, and we’ll tell you straight what’s working and what needs fixing.
This guide has been checked against Hubdoc’s, Xero’s, and QuickBooks’ publicly available product and support pages, including Xero Central and hubdoc.com, as of September 2026. Menu labels and exact screens can still shift as the products update — confirm current steps, screen names, and plan inclusions at hubdoc.com, central.xero.com, or QuickBooks’ official support site before relying on this guide operationally. This is general product information, not financial, tax, or legal advice.